User Joezawaki at Sparkfun Electronics posted this very helpful diagram about a month ago:

I followed that almost to the letter to get the unit powered up properly.
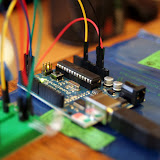
I had a bit of trouble because the above graphic shows the underside of the module, so I made this to make things a bit clearer:

I used an Arduino Duemilanove which runs at 5 volts, so I also used a Sparkfun Logic-Level Converter in between the serial port on the GPS module and the Arduino. I tried for a while to build a voltage divider to knock the serial communication down but I never could get it right (I know, my n00b is showing). The Sparkfun convertor is a great piece to have in your parts arsenal. They’re cheap, breadboard friendly and make life much easier.
Now to the matter of code. As would be expected, the code you use is really driven by a matter of what you want to do with the Copernicus. The TinyGPS library is a great NMEA parser and the example code will get you up and running if you want to pull data from the GPS into text. If you want raw NEMA sentences in order to use your Copernicus with software such as ArcGIS or Google Earth you will need to use a sketch designed to output unparsed NMEA data such as the one provided in the Aduino Playground.
There’s a few things I learned in my futzing with the Copernicus that I think are useful.
1. Realize that you are working with a serious GPS unit. The Copernicus is capable of a lot of great things and as such it is a bit more complicated than working with other units. With great power comes a lot of headscratching.
2. There are two serial ports, one (RXB and TXB) default to outputting NMEA sentences at 4800 baud. The other (RXA and TXA) default to outputting Trimble Standard Interface Protocol (TSIP) data, which is Trimble’s proprietary data stream. TSIP is incredibly powerful and cool. I have no idea how to use it.
3. RTFM. Just do it, the manual is 238 pages long and it’s written in really good english. It’s not something to be trifled with.
Feel free to comment or email with any questions or corrections, I’m always up for input!
UPDATE:
Here is a very basic GPS sketch that I was using when I was working with this unit more frequently. I'm pretty sure it works - it at least outlines the basics of what you need to do to receive data from the unit. I don't have a decent workbench set up right now so I'm not able to test it out.
It's pretty straightforward. Bear in mind that this code is four years old now, there have likely been updates to the libraries that it uses - I would highly recommend looking through the documentation for those before diving into this. (But who am I kidding - you're just going to copy/paste it and see if it works before you do any of that.)
#include#include//GPS Shield switch set to UART#define RXPIN 0#define TXPIN 1//Set this value equal to the baud rate of your GPS#define GPSBAUD 4800// Create an instance of the TinyGPS objectTinyGPS gps;// Initialize the NewSoftSerial library to the pins you defined aboveNewSoftSerial nss(RXPIN, TXPIN);// This is where you create prototypes for the functions that will be used.void getgps(TinyGPS &gps);//General variablesfloat latitude, longitude;float velocity, azimuth;void setup(){//Serial for debugging purposesSerial.begin(4800);Serial.println("Serial Started");//Sets baud rate of your GPSnss.begin(GPSBAUD);}void loop(){//Serial.println("Out of loop");while(nss.available()) // While there is data on the RX pin...{int c = nss.read(); // load the data into a variable...if(gps.encode(c)) // if there is a new valid sentence...{// Do Stuffgps.f_get_position(&latitude, &longitude);//lcd.noBlink();//lcd.clear();//lcd.setCursor(0,0);//lcd.print(latitude,4); lcd.print(longitude,4);//lcd.setCursor(0,1);// Get speed and azimuthvelocity = gps.f_speed_mph();azimuth = gps.f_course();//Debugging serial stuffSerial.println(latitude);Serial.println(longitude);Serial.println(velocity);Serial.println(azimuth);}}delay(3000);}